
In this tutorial lets see how to use photoshop to convert a photo into a pencil sketch masterpiece. There are numerous ways to do it in Photoshop, but i will show you the easiest way to get the best result.
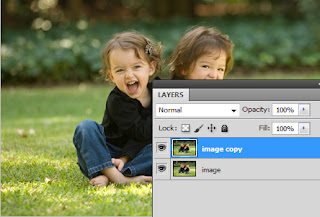
So lets start with good a picture.

Step1: Duplicate the image layer.(Shortcut key Ctrl+J)
Step2: Make sure the duplicate layer is selected and go to Image > Adjustments > Desaturate. You can refer image below.
(Shortcut key Ctrl+ Shift +U)
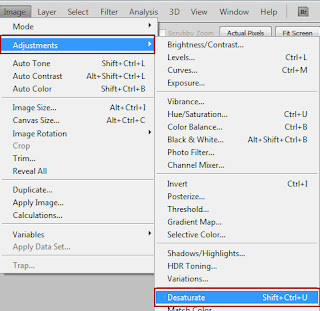
This will make the photo Black and White.

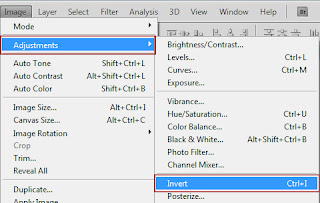
Step3: Again duplicate the desaturated layer and then go to Image > Adjustments > invert.
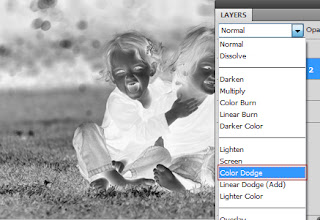
Step4: Now change its blend mode to color dodge from layer panel option.
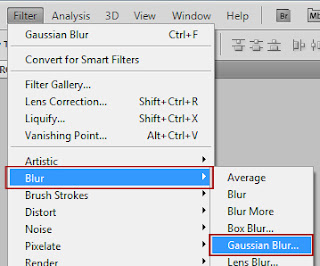
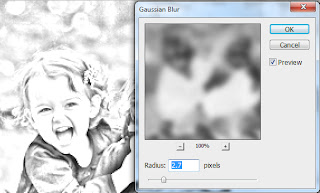
Step5: Here comes the final step go to Filter > Blur > Gaussian Blur.
Adjust the settings as per your photo. I have given 2.7 pixels radius.
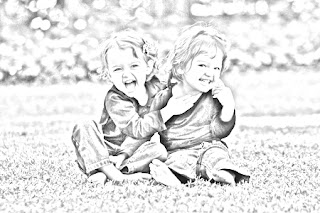
So here is the Final result. Check out pencil sketch below.
Hope you found this tutorial useful. Do drop in your view and ideas through your comments.
Like us on Facebook and be a fan.
So lets start with good a picture.
Step1: Duplicate the image layer.(Shortcut key Ctrl+J)
Step2: Make sure the duplicate layer is selected and go to Image > Adjustments > Desaturate. You can refer image below.
(Shortcut key Ctrl+ Shift +U)
This will make the photo Black and White.
Step3: Again duplicate the desaturated layer and then go to Image > Adjustments > invert.
Step4: Now change its blend mode to color dodge from layer panel option.
Step5: Here comes the final step go to Filter > Blur > Gaussian Blur.
Adjust the settings as per your photo. I have given 2.7 pixels radius.
So here is the Final result. Check out pencil sketch below.
Hope you found this tutorial useful. Do drop in your view and ideas through your comments.
Like us on Facebook and be a fan.
No comments:
Post a Comment